Monday 19 February 2024

Aircraft equipped with ballistic recovery systems


Aircraft equipped with ballistic recovery systems (BRS) offer the unique ability to deploy a large parachute in emergency situations, potentially saving lives by slowing the descent and allowing for a controlled landing. While not yet widespread, there are several categories of aircraft currently utilizing BRS technology:


Light Sport Aircraft (LSA) and Ultralights:
These smaller, recreational aircraft are most common with BRS, often as standard equipment. Examples include:

  • Cirrus SR20/SR22: The first certified aircraft with a BRS, called CAPS (Cirrus Airframe Parachute System).
  • Cessna 162/172/182: Some models offer BRS as an option.
  • Diamond D-Jet: While production is currently suspended, it had BRS capability.
  • Various LSA and ultralight brands: Models from Sport Aircraft GmbH, BRM Aero, Pipistrel, and others offer BRS options.

Gliders and Powered Gliders: While not strictly airplanes, some gliders and powered gliders incorporate BRS for additional safety, especially if they lack an engine for restarting.

Experimental and Special Use Aircraft: Prototypes, custom-built aircraft, and unique designs sometimes utilize BRS for increased safety margins.

Military Applications: Though less common, military research and development programs have explored BRS use in specific unmanned aerial vehicles (UAVs) and experimental aircraft.

Limitations and considerations:

  • BRS systems are primarily effective in situations where there's sufficient altitude for deployment and parachute descent. They wouldn't be helpful in low-altitude emergencies.
  • Weight limitations currently restrict BRS to smaller aircraft.
  • Training and proper understanding of the system are crucial for its safe and effective use.

Overall, BRS technology continues to evolve and may see wider adoption in various aircraft categories in the future. It's important to note that its presence doesn't eliminate all risks, but it can offer a valuable last resort in specific emergency scenarios.

Friday 10 March 2023

Airbus FIN Functional Item Number


The equipment on the A/C is identified by a unique identifier designated Functional Item Number (FIN). The basic element of the FIN is a two letter code indicating to which System/Circuit the equipment belongs. To this code are added prefixes and/or suffixes which provide the unique identification for individual items of equipment.

AIRBUS has defined functions for each system, these functions are called Functional Item Numbers (FINs). The physical item installed on the aircraft is the Part Number (PNR). The FIN is unique in the aircraft even if one PNR can be used for several FINs.

Each part with a precise function within an A/C system is defined with a specific identifier called FIN. A part may have a multiple quantity retaining the same FIN should it be the same function. Typical example would be the PAX layout whereby a seat is located several times in the A/C and has just one designated FIN.

The FIN is generally unique in the Aircraft. The location of the FIN may vary from Aircraft to Aircraft if the associated system is located in a different position.

Airbus uses a specific method to identify the location of components on aircraft – a unique identifier known as a Functional Item Number (FIN). All components not specifically related to a circuit are identified by fictitious circuit letter V. The second letter defines the type of component.

  • VC – Electrical connectors
  • VU – Panels / Racks

The panels and racks are identified in fictitious (imaginary) circuit VU by a numerical designator.
Example: 123VU –

  • 123 : Component prefix
  • VU : Fictitious circuit code
  • VU – Virtual Unit

The circuit letter M is reserved for mechanical FINs. Example: 2381HM.

A complete list of system/circuit letter codes and an explanation of the FIN breakdown can be found in the Introduction of the Aircraft Schematic Manual (ASM), Aircraft Wiring Manual (AWM) and Aircraft Wiring List (AWL).

Wednesday 17 August 2022

Types of Fiber Optic Connectors and Their Uses


Connectors, also called terminations, link cables together with a secure connection that permits pulses to travel through the cable without interruption. To accommodate different applications, there are many fiber optic connector types. Choosing between the correct connector types for specific use ensures ideal performance of the fiber optics cables and the devices they connect.

What Is a Fiber Optic Connector?

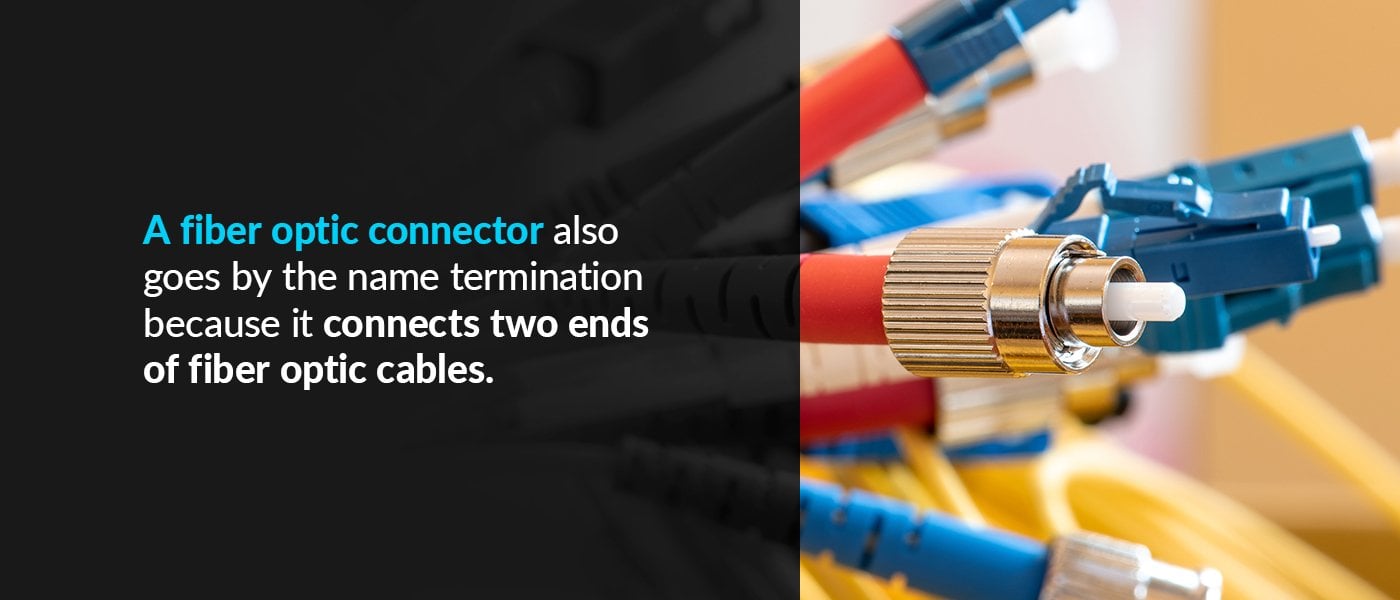
A fiber optic connector also goes by the name termination because it connects two ends of fiber optic cables. These connectors hold the fiber optic cables together inside the ferrule to attach them to the other side of the cables. Ferrules are the connector end pieces that include the method of connecting and securing the termination. Some ferrules will plug into a mating adapter and screw to hold the two portions together. Others use a bayonet design, while some snap together.

Some ferrules have a spring-loaded connector to hold the pieces together with constant force for improved connection. Most fiber optic connectors require effort to connect and disconnect, reducing the chances of accidentally pulling the cables apart during typical use or installation of other components. Connectors can also bring a cable into a converter or directly into the device serviced by the fiber optic cable.

What Are Fiber Optic Connectors Used For?

Terminations have multiple uses, depending on the fiber optic cable connector types used. For instance, fiber optics have uses in the following areas:

1. Internet and Local Area Networks (LANs)

Fiber optic cables allow for greater bandwidth compared to other cable options. Common uses for networking include fiber optics for delivering internet and LAN connectivity 
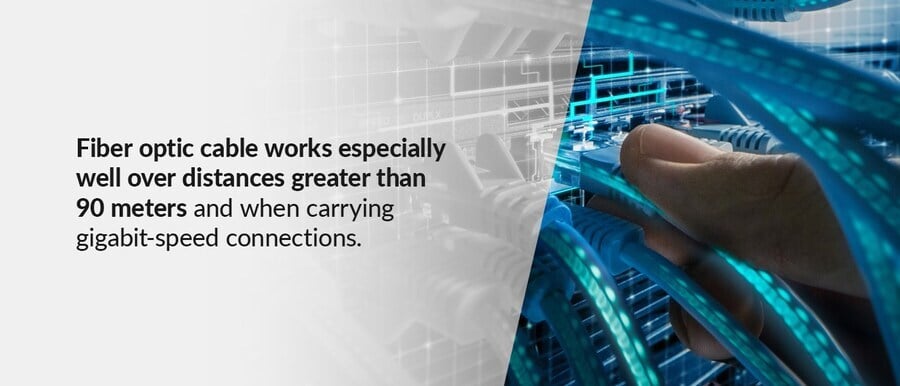
throughout a building. Fiber optic cable works especially well over distances greater than 90 meters and when carrying gigabit-speed connections. Both LAN and high-speed internet use multimode fiber optic cable.

Many companies today have fiber cable going to telecom closets that then transfer the signal to copper-based Cat5 cable and other cables. These cables carry the signal to computers and telephones. However, this practice of using media converters or telecom closets may disappear over time. Innovations in fiber optic technology, high costs for maintaining telecom closets and lowering prices for fiber optics may eventually make all fiber networks the norm.

2. Community Antenna TV (CATV) and Other Telecommunications

Community antenna TV and other telecommunications companies often prefer fiber optic cable to deliver their signals due to the lower cost over long distances with less loss and higher bandwidth compared to older technologies. Additionally, each transmitter and receiver pair of fibers can carry more voice and video signals. Compared to wire delivery methods, fiber optics can go 100 times farther and more than 1,000 times faster. CATV may use single-mode fiber optic cabling for its higher bandwidth and lower loss.

3. Digital Telephone Service

Telephony is another system that benefits from fiber optic cable use. Like CATV, many digital telephone applications use single-mode fiber cable. In fact, in the business world, telephony is one of the top uses for fiber optic cables.

4. Public Utility Networks

Public utilities, such as electrical companies or municipal water treatment facilities, use fiber optics in several ways. They may have fiber optic connected closed-circuit TV (CCTV) security cameras and a network connecting various sites to provide real-time data on operations. Electrical companies, for instance, recognized the interference of their production and distribution equipment on traditional communications wires and made an early switch to fiber optics.

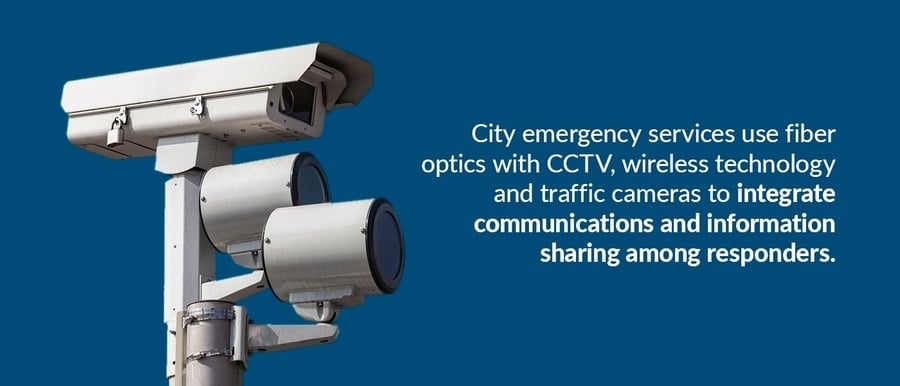
City emergency services also use fiber optics with CCTV, wireless technology and traffic cameras to integrate communications and information sharing among responders. Plus, fiber connectivity through in-city networks can offer higher bandwidth to accommodate large numbers of city workers on the system accessing information at once.

5. Industrial Networking

As with electricity companies, electromagnetic interference also plays a role in the choice of communication products used in industrial businesses. Electrical noise from equipment can cause severe problems with unshielded wire cable. But it does not do the same for fiber optics. With many industrial facilities moving into smart operations with devices connected to each other and the internet over a network, reliable connectivity is vital.

For industrial applications, connectors must have firm attachments that cannot easily dislodge, even from constant vibrations caused by machinery operating nearby.

6. Military Networks

Military operations need connectivity in some of the harshest environments on the planet. Battlefields, naval ships, military bases and planes all need to have means of connecting. Interference, movement and tapping into the communications lines pose threats for the military. Fiber optic cable resolves these issues. Plus, on vehicles and planes, it reduces the weight required for communications hardware.

7. Security Systems

Security systems often need reliable data transmission lines that can deliver video and audio quickly. Fiber optic cabling for closed-circuit TV (CCTV) offers multiple advantages. First, the two-way direction of fiber optic cable allows an operator to control the camera angle when needed. The ability to control the camera ensures better viewing of suspicious targets, which improves security.

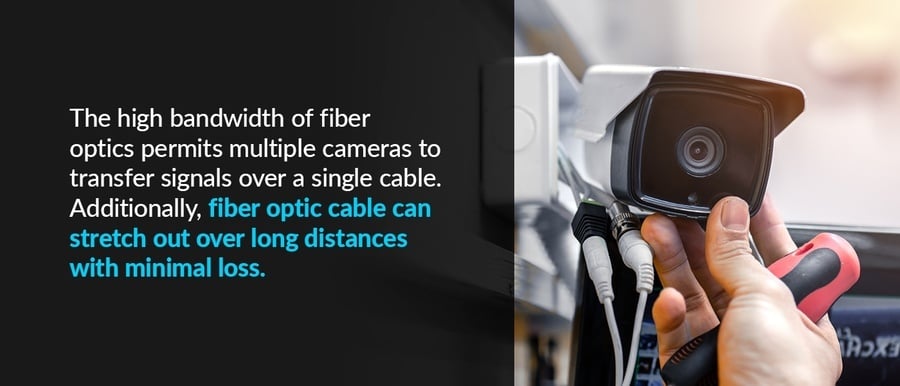
The high bandwidth of fiber optics permits multiple cameras to transfer signals over a single cable. Additionally, fiber optic cable can stretch out over long distances with minimal loss. Therefore, securing cities, airports, warehouses, factories and other larger facilities is possible thanks to fiber-optic connected CCTV. CCTV is not the only security system use for fiber optics, though. Some systems can use sensors and perimeter alarms connected through fiber cable for a comprehensive means of monitoring a property's security.

 8. Lighting

One of the least considered applications of fiber optics is the ability to transfer light over long distances rather than data signals. Therefore, lighting heat-sensitive locations, difficult to reach places or sites where standard electric wiring could be dangerous can use fiber optic lighting. Some common uses of this type of lighting include museum displays near delicate artifacts and in fountains or swimming pools. With multiple filters and the ability to automatically switch them, color-changing effects are possible.

What Are the Types of Fiber Optic Connectors?

Fiber connectors differ based on what types of cables they connect. For example, single-mode fiber connectors and multimode fiber connectors each pair with the cable with the same mode compatibility. 

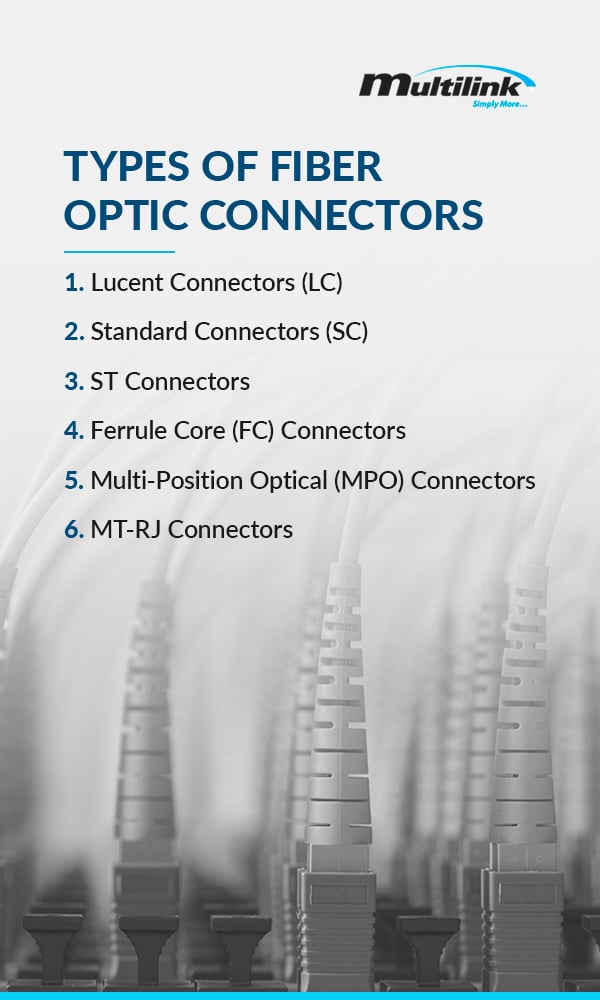
With many electronics that require fiber optic connections, several types of terminations exist. The most common fiber connectors are LC and SC. SC and LC connector types are so common that many systems have designs to accommodate them. What are the different types of fiber connectors? They are as follows:

1. Lucent Connectors (LC)

LC connectors have some of the smallest ferrules, measuring 1 1/4 mm, which is approximately half the size of an ST connector. Their tiny size puts them into the small form factor category of terminations. These connectors work well for multimode transceivers and single-mode cables.

2. Standard Connectors (SC)

SC connectors have a 2 1/2 mm ferrule that snaps cleanly into place. Using a push and pull motion secures the connector. These types of terminations have high levels of performance, which along with a price drop since their introduction, has contributed to their vast popularity in multiple applications. In fact, many formerly ST connectors applications now use SC connectors instead, since SC was invented to supplant ST in both telecommunications and data communications.

3. ST Connectors

ST connectors are among the oldest of fiber cable connector types. Until 2005, this proprietary AT&T brand of connector ranked as one of the most popular fiber terminations. While solutions that solve some issues ST connectors present have replaced these connectors, they still remain popular. Today, their cost is low due to their age, making them a choice for budget-mindful projects.

The design of ST connectors is a 2 1/2 mm ferrule that has a bayonet-style connection between the fibers through an adapter. These ferrules use a spring-load design that can make installation difficult unless the parts have precise seating, though a keyed slot assists with aligning the ferrules for connection.

4. Ferrule Core (FC) Connectors

FC connectors rank as some of the most popular for use with single-mode connections before the introduction of LC and SC connectors. These use a keyed, screw-in type ferrule. However, the process of screwing in the ferrule requires extra time and effort compared to snap-in SC connectors. 

The screw-in design prevents the connection from interruptions, even when someone pulls the cable or the system has applications in areas with a lot of movement. Video over fiber is one use for these types of connectors due to the constant flow of data through the cable and the security of the connector.

Like ST and SC connectors, FC terminations use a 2 1/2 mm ferrule. With a hybrid adapter, anyone can create a bridge between these connector types.

5. Multi-Position Optical (MPO) Connectors

MTP is the commercial brand of MPO connectors. MTP and MPO connectors are the same, except the MTP brand has a specific use for high-performance applications, whereas MPO works on more mechanical situations. These two connectors usually connect ribbon cables with multiple fibers.

These connectors have two to six rows of 12 or 16 fibers. MPO connectors with 12 fibers per row can have two to six rows, with two the most common number. Connectors that have 16 fibers per row do not have more than two rows. Connections between ferrules use pins and holes to mate the ends of the fiber with another cable or an electronic device. Most often, this type of connector has applications in either high-speed links that use multimode or for pre-terminated cable groupings.

6. MT-RJ Connectors

Today, MT-RJ connectors have disappeared from use. However, some systems may still require these connectors for repairs. MT-RJ only works for multimode cables with duplex fibers. Both fibers go into the ferrule that connects to its mated half with pins and holes, similar to MPO terminations. Some plug-and-jack variations on this type of connector also exist.

What Are the Advantages and Disadvantages of Fiber Connectors?

Fiber connectors have distinctive pros and cons for the different models. When considering the different types of connectors, weigh their applications and the positive and negative attributes of each to ensure proper selection and installation of the terminations.

Advantages and Disadvantages of LC Connectors


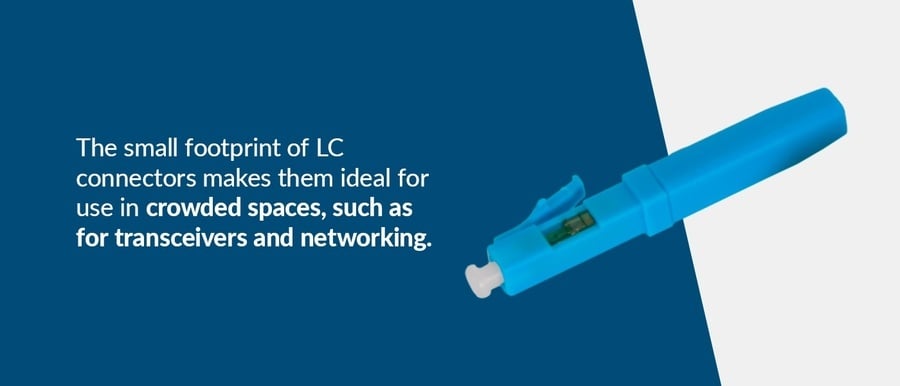
The small footprint of LC connectors makes them ideal for use in crowded spaces, such as for transceivers and networking. Other advantages of these terminations include the ability to use a clip to convert to a duplex from a simplex and the ease of adding a connector to the end of a cable. These connectors also have a design that makes pulling them out of place difficult.

The small size can pose a problem when removing them, especially in high-density sites. Most people have difficulty reaching the clip to disconnect these terminations due to the tiny size of the ferrule and the cramped space these connectors often appear in. Many people solve this issue by using an extractor for LC connectors.

Advantages and Disadvantages of SC Connectors

SC connectors have a square shape for the ferrule, which eases arranging them into a small space. Plus, its sturdy hold prevents connection problems, even if someone pulls the cable. This advantage solves an issue with ST connectors that can interrupt fiber optic signals if someone pulls on the cable. Since the SC has a standard 2 1/2 mm size, it can pair with an FC or ST connector with a hybrid adapter.

The disadvantage of using SC connectors is the size of their ferrules. These connectors require more space than small form factor designs, like the LC. Therefore, for the most compact spaces or crowded areas, LC connectors might provide a better solution.

Advantages and Disadvantages of ST Connectors

Since ST connectors are older, several multimode fiber cable systems use these types of terminations. While pushing and twisting each spring-loaded ferrule is simple, the process does require more time than other connectors. In some instances, the spring-loaded connector can disrupt the connection by pushing the fibers together when someone pulls the cable.

When working in small spaces, pushing in and twisting each connector also becomes difficult, especially in cases when the two halves do not have proper seating for a solid connection.

Disadvantages and Advantages of FC Connectors

FC connectors work in situations that may require assurance of a termination that will interrupt data flow. For applications such as industrial environments or on ships that may encounter rough conditions and cable movement, FC connectors work well.

Since these connectors screw into place, they also need more time for installation. In densely packed spaces, the round shape and screw-in connection require more space for installation and stacking compared to square-shaped SC connectors.

Pros and Cons of MTP and MPO Connectors

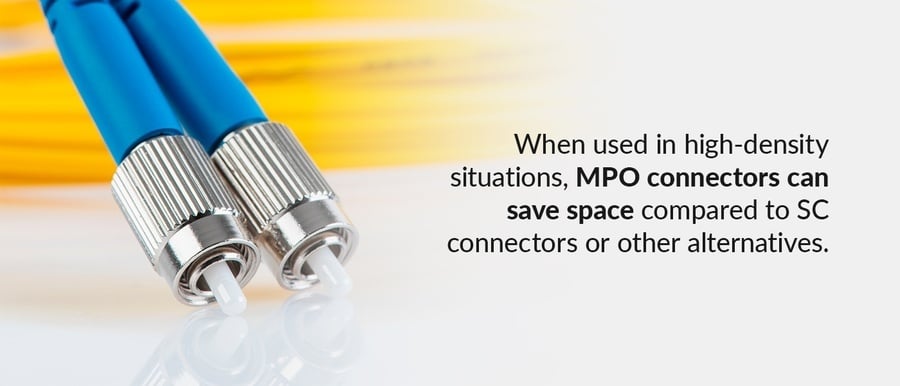
The ability to bundle multiple fibers onto a single connector is the biggest advantage of MPO connectors. When used in high-density situations, MPO connectors can save space compared to SC connectors or other alternatives. Another advantage of some MTP connectors is the ability to remove the exterior housing to easily change the type of connector or repolish the ends.

While MPO connectors offer many advantages over other terminations, especially in crowded racks, this feature also is a drawback. With so many fibers housed in a single connector, cleaning the connectors efficiently is difficult.

MT-RJ Connector Advantages and Disadvantages

The main disadvantages of MT-RJ connectors are their rarity and their difficulty for field testing. Adding this type of termination to a fiber optic cable requires polishing and splicing, like the requirements for single-mode cables. Consequently, many technicians choose to use other multimode connectors for fiber optics that offer easier installation and testing.

Choosing the Right Types of Fiber Connectors

When choosing among different fiber connectors, consulting a fiber optic connector types chart might help. Knowing the type of cable and the proper connectors for use with the cable and application help the most. The equipment the connector plugs into will also play a role in choosing the type to use. Ask the following questions about a project to choose the right fiber connector types:

1. Is the Cable Single-Mode or Multimode?


Cables have two main formats, single-mode and multimode. These modes describe the interior design and the number of rays that light travels through the fiber in. Single-mode fiber cable uses a 9-micron core through the center that light travels along in one path, thereby reducing loss and increasing potential bandwidth to 100,000 gigahertz. Both CATV and telephony use single-mode fiber cables.

Multimode uses a much larger central core, measuring 50 microns, for accommodating many different rays of light. These cables often appear in use with local area networks and other networking applications. The type of connector used must work with the cable design. For instance, SC connectors come in both single-mode and multimode formats. 

To identify the type of cable, look at the jacket color. Single-mode cables have yellow or blue covers on the cables. Multimode fiber cables will be orange, bright green or aqua. Military applications also use plain green and slate for multimode cables. Since manufacturers differ in their color choices but remain consistent across the brand, always check with the cable maker first to verify the colors used.

Connectors also have colors to designate their type. Beige typically indicates multimode connectors. Blue is for ultra-physical contact (UPC) single-mode connections, and green goes with single-mode angled physical connector (APC) fiber connectors. When determining whether to use single-mode or multimode, another decision appears when choosing single-mode connectors — the type of physical contact.

2. What Is the Type of Physical Contact for Single-Mode Connectors?

The type of connection with single-mode cables is crucial. Today, single-mode connectors use physical contact (PC). Some PC connectors have convex ends, which increase the contact between the cores of the cables. This reduces loss and reflectance, earning the name of ultra-physical contact.

In some single-mode connectors, angling this physical connection to 8 degrees creates an angled physical connector, which reduces reflectance even more than convex PC connectors. This type of connection ensures better connectivity for use with CATV and similar applications.

3. What Connector Does a Device Require?

Lastly, consider what type of connector the electronics require. Look at the type of connection required and use that to inform a decision on the type of terminations needed for the fiber optic cables leading to the device.

Guide to Fiber Optic Cable Splicing


fiber optic splicing

In the technological age, fiber optic cables are an essential component in data networking and communications. Our world relies on extensive cable networks to function, and the companies that maintain these cables are responsible for various precision processes — including fiber optic cable splicing. Understanding this process, approaches and best practices can help integrators achieve accurate and functional splices in a range of scenarios.

What Is Fiber Optic Cable Splicing?

In short, fiber optic cable splicing is the act of joining two fiber optic cables. In instances where a single cable is not long enough for an application, splicing allows technicians to extend it for the required run. Splicing can also be helpful when fiber optic cables need restoration, or they've broken during an installation.

Cable splicing exists across industries. If a sector uses fiber optic cable, splicing likely makes an appearance. Some of these industries include:

  • Automotive: Fiber optic cables quickly transmit signals, making them ideal for vehicle safety features like airbags. These cables are also used in exterior and interior lighting.
  • Medical: Many advanced medical tools allow surgeons and doctors to perform advanced procedures and care for patients more effectively. Technology like endoscopes, X-ray systems and more rely on fiber optic cables to function. 
  • Telecommunications: Optical cables form a vast network around the world to connect people to one another. Phone calls, video and data can move through fiber optic cables, making mass communication possible. Splicing is a necessity to maintain telecom networks.
  • Computer networking: A Local Area Network (LAN) relies on fiber optic cables to connect computers in a defined location. These networks are common in office buildings, universities, laboratories and residential areas.

How to Safely Handle Optic Cable Splicing

Fiber optic cable splicing comes with risks, so it's essential to maintain proper safety practices to protect yourself and those around you.

When you handle cable splicing, you should:

  • Wear personal protective equipment (PPE): When splicing cables, small fibers can attach to your clothes and skin. While these fibers are hard to see with the human eye, they can cause damage. Wearing PPE like aprons, gloves and goggles will prevent any major damage as you work.
  • Keep food away from the workspace: Fiber particles and small glass fragments can collect in food and beverages and can damage your throat and disrupt your digestive system. Keep anything edible away from the workspace and save it for your lunch break.
  • Work in a well-ventilated area: A well-ventilated work area will create space for fiber particles to flow away from you and other people in the space.
  • Practice fire safety: Fusion splicers can ignite flammable materials. Before you begin the splicing process, make sure the area is clear of any flammable gases and other materials.
  • Ensure proper cleanup: Once your splicing project is complete, properly dispose of fiber pieces. Mark your trash to alert others to the glass debris.

Two Methods of Fiber Optic Cable Splicing

As fiber optic cable splicing becomes a more common practice, accurately performing the process becomes more accessible. As of now, you have two process approaches to choose from — mechanical splicing and fusion splicing.

Before approaching your installation, you should have a clear understanding of both methods. Understanding their steps and characteristics will help you determine which process is appropriate for your performance needs and pricing constraints.

Mechanical Splicing

In mechanical splicing, integrators create a junction of two or more optical fibers with a self-contained assembly. This self-contained assembly requires an alignment device and an index matching gel that fills in the air gaps between fibers. This gel needs to have a similar refractive index to the fibers to improve light transmission across the joint with low back reflection. 

There are four key steps to mechanical splicing:

  1. Fiber preparation: Before splicing your fibers, you must strip them of all protective coatings, tubes, jackets and other external protectants. This first step makes it possible to access the fibers and join them. You'll know you've stripped your fibers when you can see nothing but bare fiber. For the splicing process to work smoothly, you should ensure your fibers are clean following the stripping process.
  2. Cleaving: Using a fiber cleaver, you need to create a clean cut on your fibers. The cut should be perfectly perpendicular to the fiber axis, and you should perform this cut on each end you intend on splicing. 
  3. Mechanical joining: The joining process does not require heat, which is why it's called mechanical splicing. In this step, you have to position the fiber ends together in your splicing unit. Your index matching gel will link the light in the ends of your cable. In older splicing units, you may need to use epoxy instead. Precision is essential in this step.
  4. Securing: Once you've joined your fiber ends, you can place your fibers in a splice tray and closure to keep them secure. While the mechanical splice housing acts as its own protective barrier, you should also seal your cables to prevent moisture from entering the splice.

Fusion Splicing

Fusion splicing uses an electric arc or specialized machine to fuse glass fiber ends together. When the ends are fused precisely, you create a reliable joint with near-zero back reflection and minimal insertion loss. 

This process starts similarly to mechanical splicing with fiber preparation and cleaving. Fibers must be free of any protective coatings and cleanly cut before fusion splicing can begin. Using an isopropyl alcohol wipe will provide the cleanliness needed for smooth splicing. After these steps, you can work through the fusion process.

A fusion splice is typically performed with a fusion splicing machine. These machines have a space to place each cable and an electrode mechanism in the center that fuses the fibers together. Alignment is critical in these machines to ensure the weld is precise. Some machines will have an automatic alignment feature, while others require manual adjustments. 

Fusion splicing equipment may stop the process if certain characteristics are not correct. Poor alignment, dirty fibers and cuts outside of 90 degrees may cause the splicer to stop. Once a fusion is successful, the splicing machine will report the estimated attenuation of your fused fibers.

Mechanical Splicing vs. Fusion Splicing: Which Is Better?

Knowing that you have two different options to handle fiber optic cable splicing, you may want to know which one is the better option. When comparing the two processes, there are three factors to consider — performance, price and environment.

Performance

One of the most notable differences between mechanical and fusion splicing is their performance. Fusion splicing is a higher quality method that results in minimal loss and a permanent joint. Loss values are typically less than 0.05 dB. When a fusion splice is well-executed, it may not even register on an optical time domain reflector (OTDR), which is an ideal splice result.

Mechanical splicing doesn't physically join fibers together as the fusion method does. The closeness of the fibers allows them to function, but it often results in higher loss values. In an application where several splices are needed, these losses add up. The one performance factor that mechanical splicing has over fusion splicing is its compatibility with multi-mode fibers.

Price

Another notable difference between the two methods is how much it costs to complete them. Since fusion splicing requires a specialized machine, the required costs can be much higher than a mechanical splice. While the stripping and cleaver tools will cost about the same for both approaches, the machines for fusion splicing can cost thousands of dollars to yield the best results.

Mechanical splicing offers far lower short-term costs, but many operations view fusion splicers as long-term investments. The precision creates a permanent bond between fibers, and once you've purchased the machine, you won't have to buy new components for every splice as you do with the mechanical method.

Environment and Time

For most applications, fusion splicing is the method of choice because it's permanent. In scenarios where you need a reliable, long-lasting cable connection, fusion splicing provides that secure connection with minimal insertion loss and back reflection. In telecommunication networks and LANs, companies are willing to invest in fusion splicing for the necessary stability in these scenarios.

Depending on the circumstances, fusion splicing may not be the most accessible method. Mechanical splicing is preferred in moments where a quick or temporary fix is needed. In telecommunications, mechanical splicing may be the only option given the environment. If a broken cable is hard to access or in severe environmental conditions, technicians will use a mechanical splice to fix the network temporarily and perform a fusion splice when the time and environment allow it. 

As fusion splicing technology improves, these machines become more compact and easy to use in more challenging circumstances. Fusion splicing will continue to become more widely accessible, but mechanical splicing is always an option when the situation demands it.

You should apply the “which is better?” question on a case-by-case basis to reap the benefits of both methods. Being prepared for either method can make your fiber optic cable repairs and extensions more flexible.

Best Practices for Optic Splicing

Now that you understand the basic steps in mechanical and fusion splicing, you can learn about some of the best practices to apply to the process. Fiber optic cable splicing requires the utmost precision. Applying a precise approach to every aspect of the procedure will support strong results every time. 

1. Know the Signs of a Bad Splice

The quality of your splice will affect how your cable performs in your application. Are there visual differences between a good splice and a bad one? Looking for the signs of a bad splice can tell you when you need to try again or work on your strategy. Signs of a bad splice include:

  • Bubbles
  • Bulges
  • Black shadow
  • A thick black line at the splice

All of these signs can point to fibers that are poorly joined and unprepared to function. If you see any of these in your splice, redo the process. It's essential to note that splices should not be performed more than twice to protect the integrity of the fibers.

While these signs can signify undesirable performance, there are other physical features that are acceptable following a splice. After splicing, you may notice:

  • A blurred, thin line
  • A white line
  • Diameter difference
  • Dirt on fibers
  • A slight offset

These physical characteristics may make you believe the splice was not precise enough, but they are all acceptable. Your splice is ready to perform, even with these features.

2. Keep Your Splicing Tools Clean

Fiber optics are microscopic, and many particles can disrupt performance even when they're not visible. Keeping all of your tools clean is vital for keeping unwanted particles out of the splicing process. Taking the time to meticulously clean your tools before and after a splice will make a huge difference in splice quality. 

This cleanliness rule also applies to the stripping process before your splice. While you should clean your tools meticulously, cleaning your fibers closely will also support a secure and functional splice. There is no such thing as being too careful in the splicing process.

3. Maintain Your Cleaver and Use it Correctly

The cut you make to your fibers is a significant determinant of how well your splice will work. Mechanical splicing requires proper angles at end faces to prevent air gaps and excess light from escaping. A precise cut also helps you achieve high attenuation in a fusion splice. Maintaining and using your cleaver correctly will ensure a smooth process from start to finish.

Your cleaver manufacturer will include care instructions for your equipment, including how to sharpen and clean it. Follow through with this guide to make precise cuts for every splice.

4. Modify Fusion Parameters Methodically

In regard to fusion splicing, you need to handle your parameters with care. When using a fusion splicer, fusion time and current are the two parameters you'll adjust to join fibers. Finding the right parameters requires methodical adjustment. Change only one parameter at a time, and approach it with a strategy to reach the ideal figures for your fiber type.

Wednesday 24 February 2021

Tesla Model 3's motor - The Brilliant Engineering behind it

HOW TO ENDORSE TYPE RATING TO YOUR LICENCE

What is an EASA Part-147 approved aircraft type training?
EASA Part 147 approved aircraft type trainings are the trainings that you need to complete successfully in order to endorse an aircraft type to your aircraft maintenance licence. By completing an EASA Part 147 approved aircraft maintenance type training, you will be able to become a certifying staff on that particular aircraft type at an aircraft maintenance organisation. If you have an aircraft type on your aircraft maintenance licence, you will be able to be authorized to release an aircraft into service after a maintenance operation. 

Is it mandatory to go to a Part-147 approved training organisation to get type training? Can we do this training in a Part-145 approved organisation?

Only approved Part-147 organisations are entitled to conduct type training courses in accordance with Article 6 of the Commission Regulation (EU) No 1321/2014. Part-145 organisations can not perform complete aircraft type training courses.

Is it possible to perform aircraft type training in two different organisations? Can I do my practical portion of the type training in a Part-145 organisation?

Only a Part-147 organisation has the privilege to provide aircraft type training courses. This comprises both the theoretical and practical element of the aircraft type training, including the related examinations and assessments. This means that the practical element of the aircraft type training shall be completed in a Part-147 organisation.
How is the content of an aircraft type training?
According to EASA Part-147 regulations, an aircraft type trainings are divided into 2 sections: Theoretical and Practical trainings. Firstly, theoretical type training is to be completed, and then practical type training is followed. Practical type trainings are conducted in a real aircraft maintenance environment on the actual aircraft type. Aircraft type training is a complete training on the systems of a particular aircraft type that are taught at the approppriate training levels. There are 3 levels of an aircraft type training as below:
— Level 1: A brief overview of the airframe, systems and powerplant as outlined in the Systems Description Section of the Aircraft Maintenance Manual/Instructions for Continued Airworthiness. 
— Level 2: Basic system overview of controls, indicators, principal components, including their location and purpose, servicing and minor troubleshooting. General knowledge of the theoretical and practical aspects of the subject. 
— Level 3: Detailed description, operation, component location, removal/installation and bite and troubleshooting procedures to maintenance manual level.
How is the theoretical element of an aircraft type training performed?
On completion of a theoretical training course the student will be able to demonstrate, to the levels identified in the Appendix III syllabus, the detailed theoretical knowledge of the aircraft's applicable systems, structure, operations, maintenance, repair, and troubleshooting according to approved maintenance data. The student shall be able to demonstrate the use of manuals and approved procedures, including the knowledge of relevant inspections and limitations.
Theory element of an aircraft type training is performed in a classroom environment by using power point presentations, visual aids on the particular aircraft type and CBTs.
How is the practical element of an aircraft type training performed?
The objective of practical training is to gain the required competence in performing safe maintenance, inspections and routine work according to the maintenance manual and other relevant instructions and tasks as appropriate for the type of aircraft, for example troubleshooting, repairs, adjustments, replacements, rigging and functional checks. It includes the awareness of the use of all technical literature and documentation for the aircraft, the use of specialist/special tooling and test equipment for performing removal and replacement of components and modules unique to type, including any on-wing maintenance activity.
Practical type training contains the performance of many maintenance tasks including Location, Functional/Operational Test, Service and Ground Handling,  Removal/Installation, Minimum Equipment List and Trouble Shooting on different systems of the actual aircraft.
What are the durations of theoretical and practical aircraft type trainings? 
Durations may change according to the complexity of the aircraft type. However, generally speaking, theoretical trainings are usually completed within 30 training days, and practical trainings are usually completed within 15 days.
How long does the aircraft type training certificates are valid to endorse the aircraft type on my licence?
Aircraft type rating training must have been started and be completed within the 3 years preceding the application for a type rating endorsement (Part-66, Appendix III, paragraph 1 refers).

Tips for Successful Online Learning


If you’re new to online learning, first of all, WELCOME! Learning online is a fantastic way to increase your knowledge and skills in a unique, flexible environment with its own distinct strengths and opportunities.

Whether you’re trying online classes for the first time or looking for ways to strengthen your current habits and approaches, there are a few key areas to consider to set yourself up for success and take full advantage of all online learning has to offer.

In this collection of online learning best practices, we share tips and strategies to help you succeed in your learning journey, including ways to:

  • Keep your mind and body healthy
  • Effectively manage your time and minimize distractions
  • Forge connections with your virtual learning community
  • Get the most out of your learning
  • Conquer logistics

Self Care

Self-care is important to your successful learning experience. A healthy mind (and body) is a mind ready for learning.

  • Advocate for your learning needs: Ask for flexible ways of participating in the class that work for you. This is important for learners who require specific accommodations, such as a note taker or extended test time, but is also important for all learners.
  • Schedule breaks: Get up and walk around, go outside, schedule your distractions, don’t forget to move. Plenty of apps exist to keep you on task and turn off distractions, as well as remind you to get up and take breaks.
  • Maintain healthy habits: Your brain, like your body, needs rest and exercise. Get sleep, stay hydrated, go outside, eat well.

 Time Management

One of the biggest benefits of online learning is flexibility, but too much freedom can pose new challenges. Find ways to structure and optimize your time for when and where you learn best and keep your learning on track.

  • Set aside time for learning: This doesn’t mean you need to find fiver-hour blocks, five days a week unless you are on an approved course. Online learning is designed to be modular and flexible. You may find 15 minutes to watch a short video lecture and write a three-sentence reflection post. But of course, other learning activities will require more time. Be planful and dedicate time to learn as you would to exercise or spending time with friends.
  • Track deadlines: Add important due dates to a calendar so you don’t miss important deadlines.
  • Minimize distractions: As much as you can, minimize distractions both in your physical environment and your digital environment. Close web browser windows not relevant to your learning, keep the TV off, etc.

Community and Social Learning

Online learning comes with connections to both world-class professors and a global community of passionate classmates. Find ways to connect with these rich learning communities, from participating in forums to networking with peers.

  • Keep your instructor informed: Ask your instructor for help when you need it—let them know if you are ill, unable to log on, etc.
  • Virtually meet and interact with your learning peers: You are not alone! Introduce yourself, answer questions posted by the instructor in the discussion forums, and respond to your peers’ posts.
  • Create a social network group: In addition to forums, create a distinct space, such as a Facebook group or a Whatsapp chat, for you and your classmates to connect, share interests, and support each other.
  • Create virtual study groups: Keep the line open and find ways to connect with your learning peers in small study groups. Video chat apps are a great way to do this.
  • Give and expect respect: Especially during asynchronous communication like discussion boards and email, it can be easy to misconstrue someone’s meaning. Like you, your peers are real people. Do your part to foster a respectful, supportive community.

Learning Strategies

In our modern learning landscape there is vast amounts of content about virtually any topic to watch, read, and listen to, but knowing is different from doing. To get the most out of online learning, make sure you develop new knowledge and skills in a way that you can retain, apply repeatedly, and adapt to new contexts.

  • Make your learning stick: Take advantage of the established learning science principles of practice, application, and reflection. To ensure your newly learned knowledge and skills stick with you, it’s important to repeatedly practice skills, apply knowledge in different contexts, and reflect on what you have learned, especially as you practice and apply in new settings. A well-designed learning experience will provide you with opportunities to practice, apply, and reflect, but you can reinforce your learning outside of a class by connecting it to your everyday life and work.
  • Video strategies: For recorded video, pause and write a brief summary of what you have heard in notes every few minutes. For live video, especially if the video is available to watch later, avoid taking notes. Pay attention to what you are hearing and participate in the discussion to help keep your focus. Raise your virtual hand or ask a question in the chat.
  • Take advantage of video break-out groups: If offered, these live, small group discussions will give you a chance to hear other perspectives or review challenging material as a group.

Logistics

Last but not least: logistics. Nailing the details of your learning experience can pay back dividends.

  • Make relevant information easily accessible: Collect the phone numbers, email addresses, and support links for your institution in one place so, if and when you need it, you don’t have to go hunting. For example, who are the TAs for the course and how do you contact them? If you have technical issues, which department do you contact?
  • Gather your tech: If the course requires video conferencing software, download the app and test well before a live lecture begins. If assignments are uploaded to a cloud service (e.g., Google Drive, Dropbox), make sure you have the required account details or access information in advance of a deadline.
  • Minimize reliance on WiFi: If possible, use an ethernet cable and download course materials to work offline. Many online courses work in mobile, too, but others do not. Have a plan for Internet access.
  • Always save your work: Save your work locally on your computer and/or in the cloud where you can easily access it. For example, draft essays in a word processing application or in an email to yourself then cut and paste your work into the course LMS (learning management system) to turn in your assignment.

Start Learning

As an aviation training provider, our goal is to continue to be a resource to the growing online aviation learning community. Explore our online courses and programs across a broad range of aviation subjects, find more tips and inspiration in our collection of blogs.